
Table des matières:
- Auteur John Day day@howwhatproduce.com.
- Public 2024-01-30 09:08.
- Dernière modifié 2025-01-23 14:46.

Donc. Tout d'abord, J'AI LE MEILLEUR PATRON SUR TERRE pour m'avoir permis d'apporter une manette XBOX au travail. Notre service informatique et notre responsable de l'ingénierie m'ont donné leur accord tant que je l'utilisais pour le travail. Voici donc comment configurer un contrôleur de jeu pour qu'il fonctionne avec Autodesk Inventor. J'utilise un programme appelé JoyToKey qui vous permet de transformer votre contrôleur en une souris et un clavier modifiés pouvant être programmés pour fonctionner sur plusieurs applications. J'ai utilisé une manette XBOX 360 filaire exécutant le logiciel Microsoft. Le système a installé automatiquement le contrôleur, j'ai juste eu à utiliser JoyToKey pour programmer les fonctions des boutons
Vous pouvez configurer plusieurs fonctions par touche si vous le souhaitez et remplir automatiquement les données.
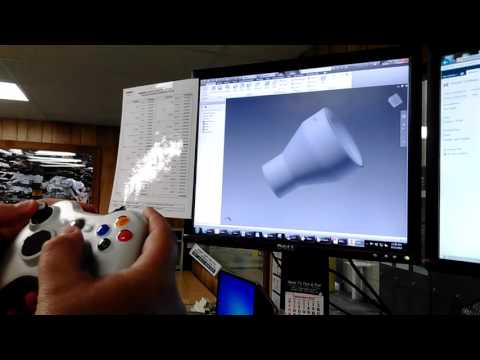
Étape 1: Chargement du programme


Suivez les images pour savoir comment installer et configurer
Étape 2: CONFIGURATION


Suivez les images pour savoir comment installer et configurer
Étape 3: CONFIGURATION


Suivez les images pour savoir comment installer et configurer
Étape 4: CONFIGURATION


Suivez les images pour savoir comment installer et configurer
Étape 5: CONFIGURATION


Suivez les images pour savoir comment installer et configurer
Étape 6: CONFIGURATION

Suivez les images pour savoir comment installer et configurer
Conseillé:
Un projet amusant pour le week-end, FishCam ! : 4 étapes

Un projet amusant pour le week-end, FishCam ! : J'ai planté mon drone il y a quelques mois et la seule chose raisonnable que je pouvais faire était de le démonter. Il s'avère que j'avais un tas d'idées de projets avec ce que je pouvais faire. Je n'en ai jamais eu, mais quand nous sommes allés dans notre ranch, j'ai eu une idée. L'appareil photo a un W
Objectif kaléidoscope amusant pour appareil photo pour smartphone : 3 étapes

Objectif kaléidoscope amusant pour appareil photo pour smartphone : dans ce projet, je vous montre comment créer un petit objectif kaléidoscope amusant qui s'adapte à votre smartphone ! C'est très cool d'expérimenter avec des objets aléatoires posés autour de la maison et de voir quel genre de réflexions peuvent être faites
Rendre l'application pour téléphone Viper Smartstart encore plus cool ! : 5 étapes

Rendre l'application Viper Smartstart Phone encore plus cool ! : J'ai un module Bluetooth viper smartstart dans ma voiture. Depuis mon téléphone, je peux verrouiller, déverrouiller, démarrer et arrêter le moteur. Il s'agit de l'Instructable que j'ai publié pour ce projet. https://www.instructables.com/id/StartStop-LockUnlo… C'est très utile cependant
Minuterie NE555 - Configuration du temporisateur NE555 dans une configuration astable : 7 étapes

Minuterie NE555 | Configuration du temporisateur NE555 dans une configuration astable : Le temporisateur NE555 est l'un des circuits intégrés les plus couramment utilisés dans le monde de l'électronique. Il se présente sous la forme de DIP 8, c'est-à-dire qu'il comporte 8 broches
Batterie rechargeable DIY pour manette Xbox One (projet en cours) : 3 étapes (avec photos)
 : 3 étapes (avec photos)")
Batterie rechargeable DIY pour manette Xbox One (projet en cours) : Avant de plonger dans les détails, j'aimerais aborder le titre. Ce projet dans un travail en cours en raison de certaines découvertes après avoir testé la première conception. Cela étant dit, je suis en train de reconcevoir le tableau pour tenir compte de certains changements que je vais passer en revue. J'ai couvert e